
Fuel: Combined
When I was a kid, I loved going with my dad to Grammie Merchant’s. It never failed, Grammie always had a fresh batch of biscuits coming out from the oven. I think it was her way of giving my dad a gift each time he went to visit. I would sit on my dad’s knee and they would talk and the biscuits would vanish.
My mom (now Grammie) has mastered the biscuit. I have tried, it feels like a gazillion recipes through the years, but never could I master the taste and consistency of the biscuit that I grew up remembering.
I had the privilege of going home and spending time with my mom and dad. While home, I insisted my mom teach me to make The Biscuit! Dad, still likes a hot fresh biscuit for dinner each night. The first night, he looked at mom, “these are a bit different”! HA! He knew, another mixer had been in the kitchen. No fooling the biscuit expert! By the end of two weeks, I had mastered them! Dad said, “you got it, these are good” I felt like I won the lotto! I had mastered the Grammie’s No Fail Biscuits, just like my mom and my grammie! Now I want to be sure I am passing it down to my girl. Here’s the simple recipe. My advice, don’t over think it! Make a pot of stew, a pan of biscuits, gather around the kitchen table and enjoy!
You will need:
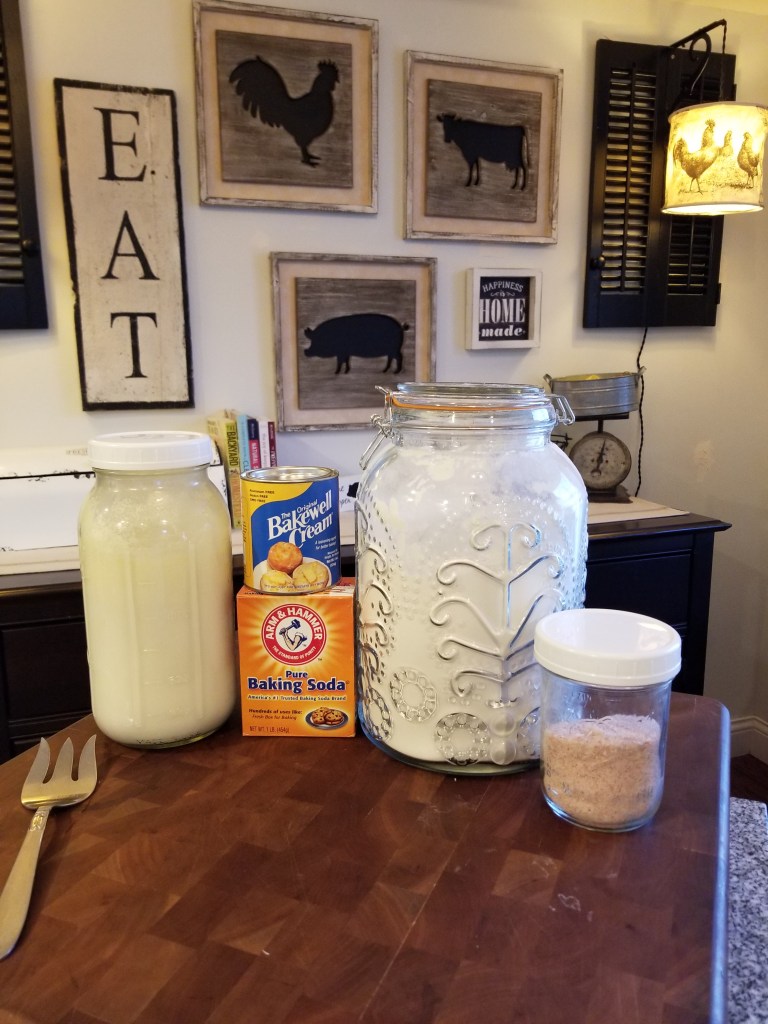
2 cups of milk (old school, sour is best!)
4 cups of flour (I use King Arthur)
1 tsp salt
2 tsp of baking soda
4 tsp of Bakewell Cream (it’s a Maine thing)
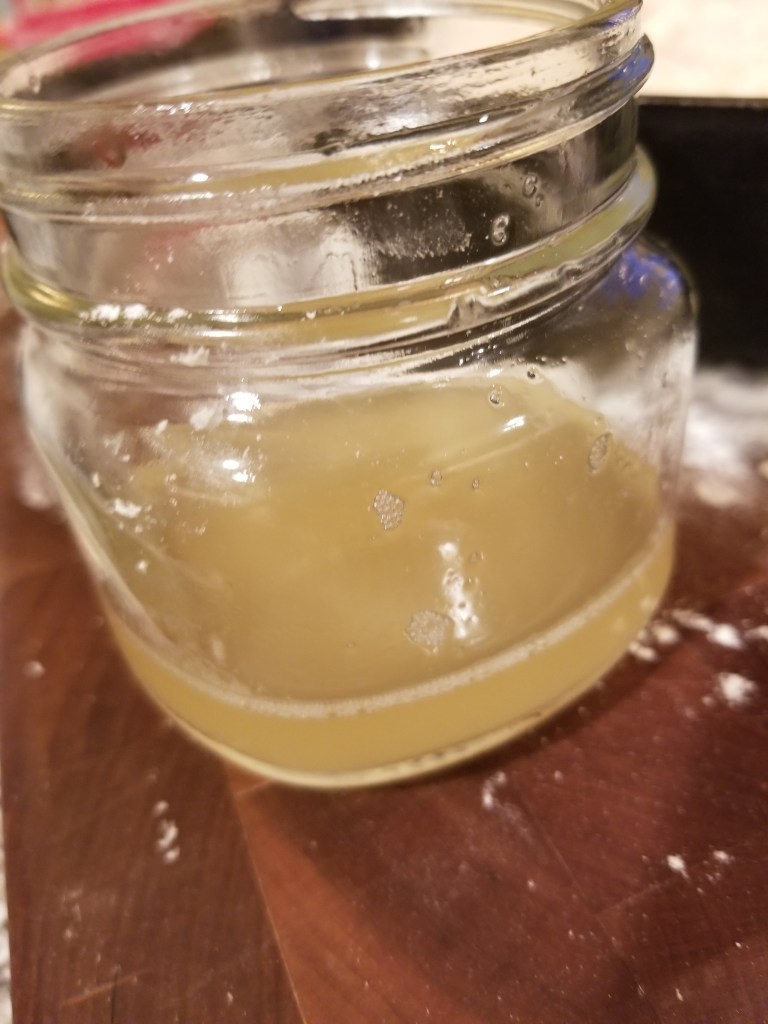
1/4 cup liquid oil – I use lard. I melt it to be liquid but I add once I have added my liquid to my flour so it does not solidify. You can use what you have, I prefer lard. (We render our own lard from pasture raised hogs, it’s full of Vitamin D!)
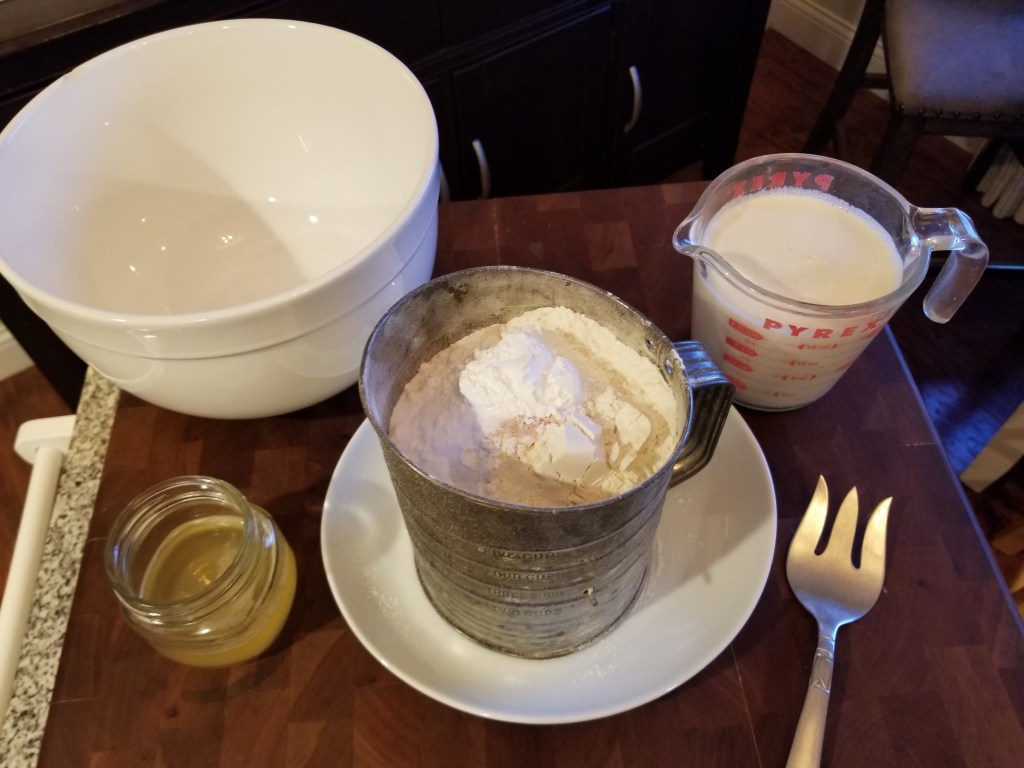
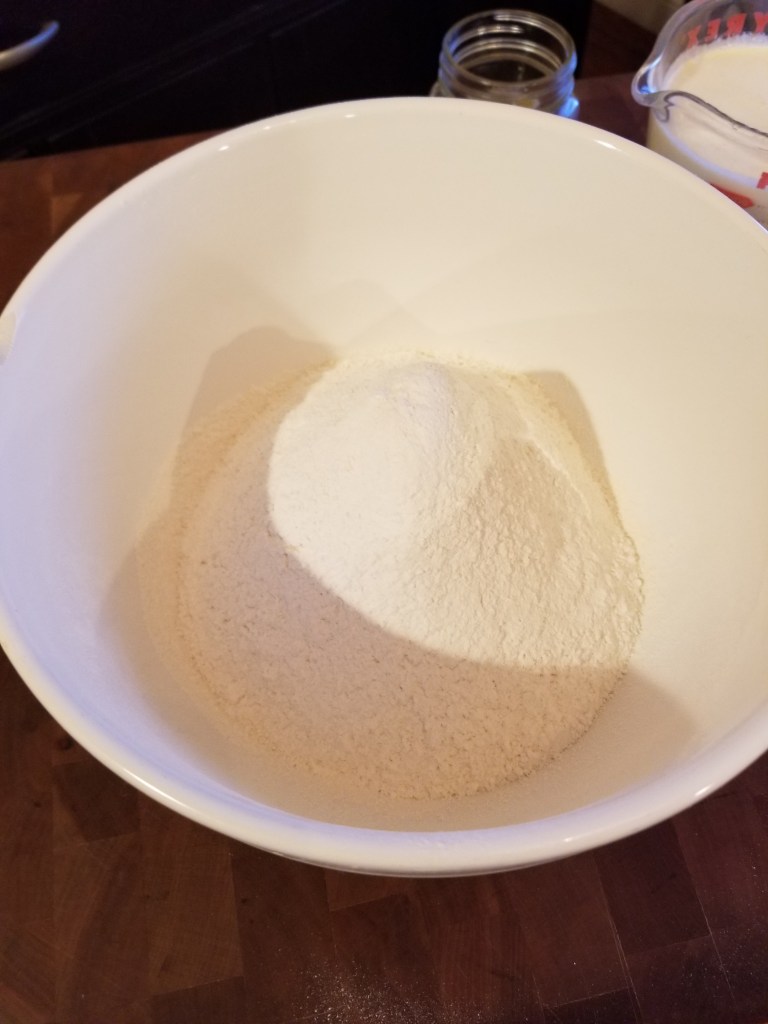
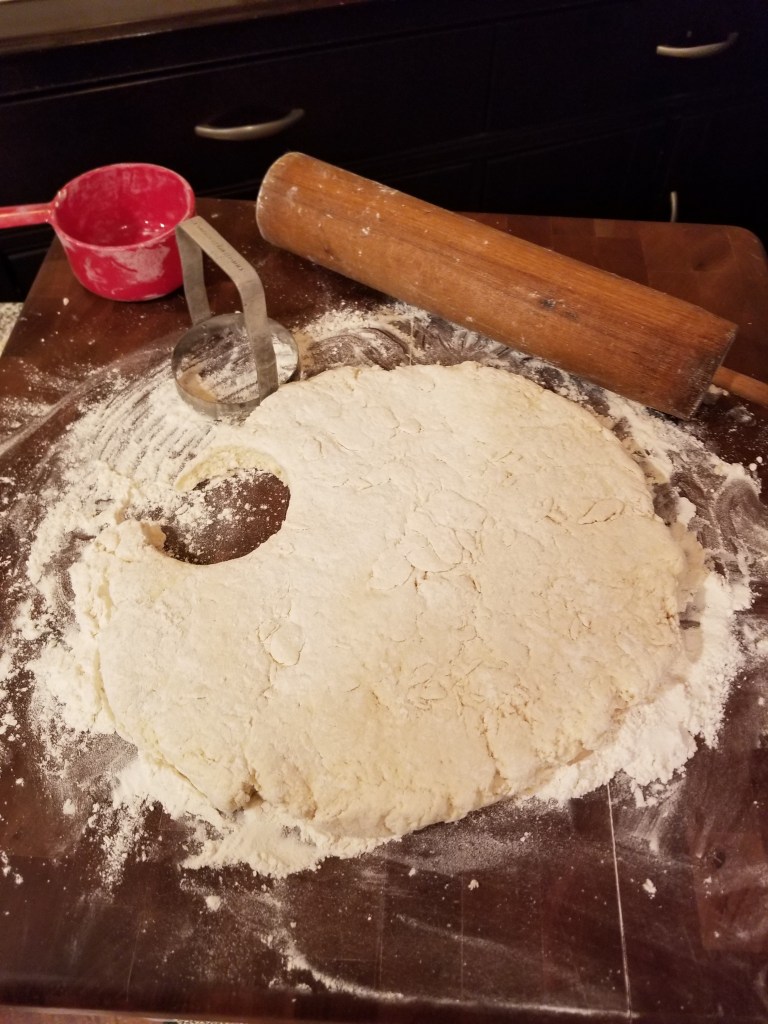
Sift all dry ingredients into mixing bowl. Create a “bowl” with your dry ingredients and then add your milk and oil into the mix. Have a sturdy mixing fork! It’s time to use the arm muscles! If you are using lard, I take a couple swipes thru then add my liquid lard. If you are using a liquid oil that does not solidify, then you can dump right with the cold milk. Mix until all is wet and sticky. Be sure not to over stir it! Just until wet and sticky!
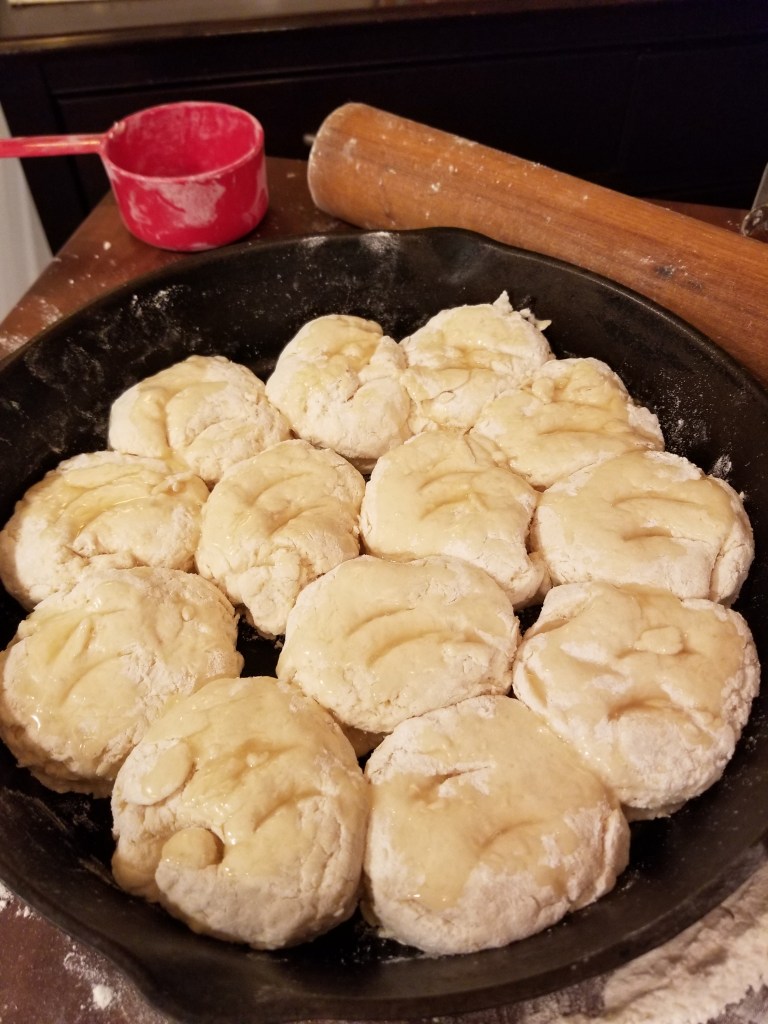
Empty ingredients onto your floured surface and roll to desired thickness. I like about an inch or so. Be sure to dip your cutter in flour before cutting your biscuits so the dough does not stick. If you do not have an official biscuit cutter, a can will work. Just be sure to punch a couple holes on the top for air to come out. An old chicken or tuna can works great!
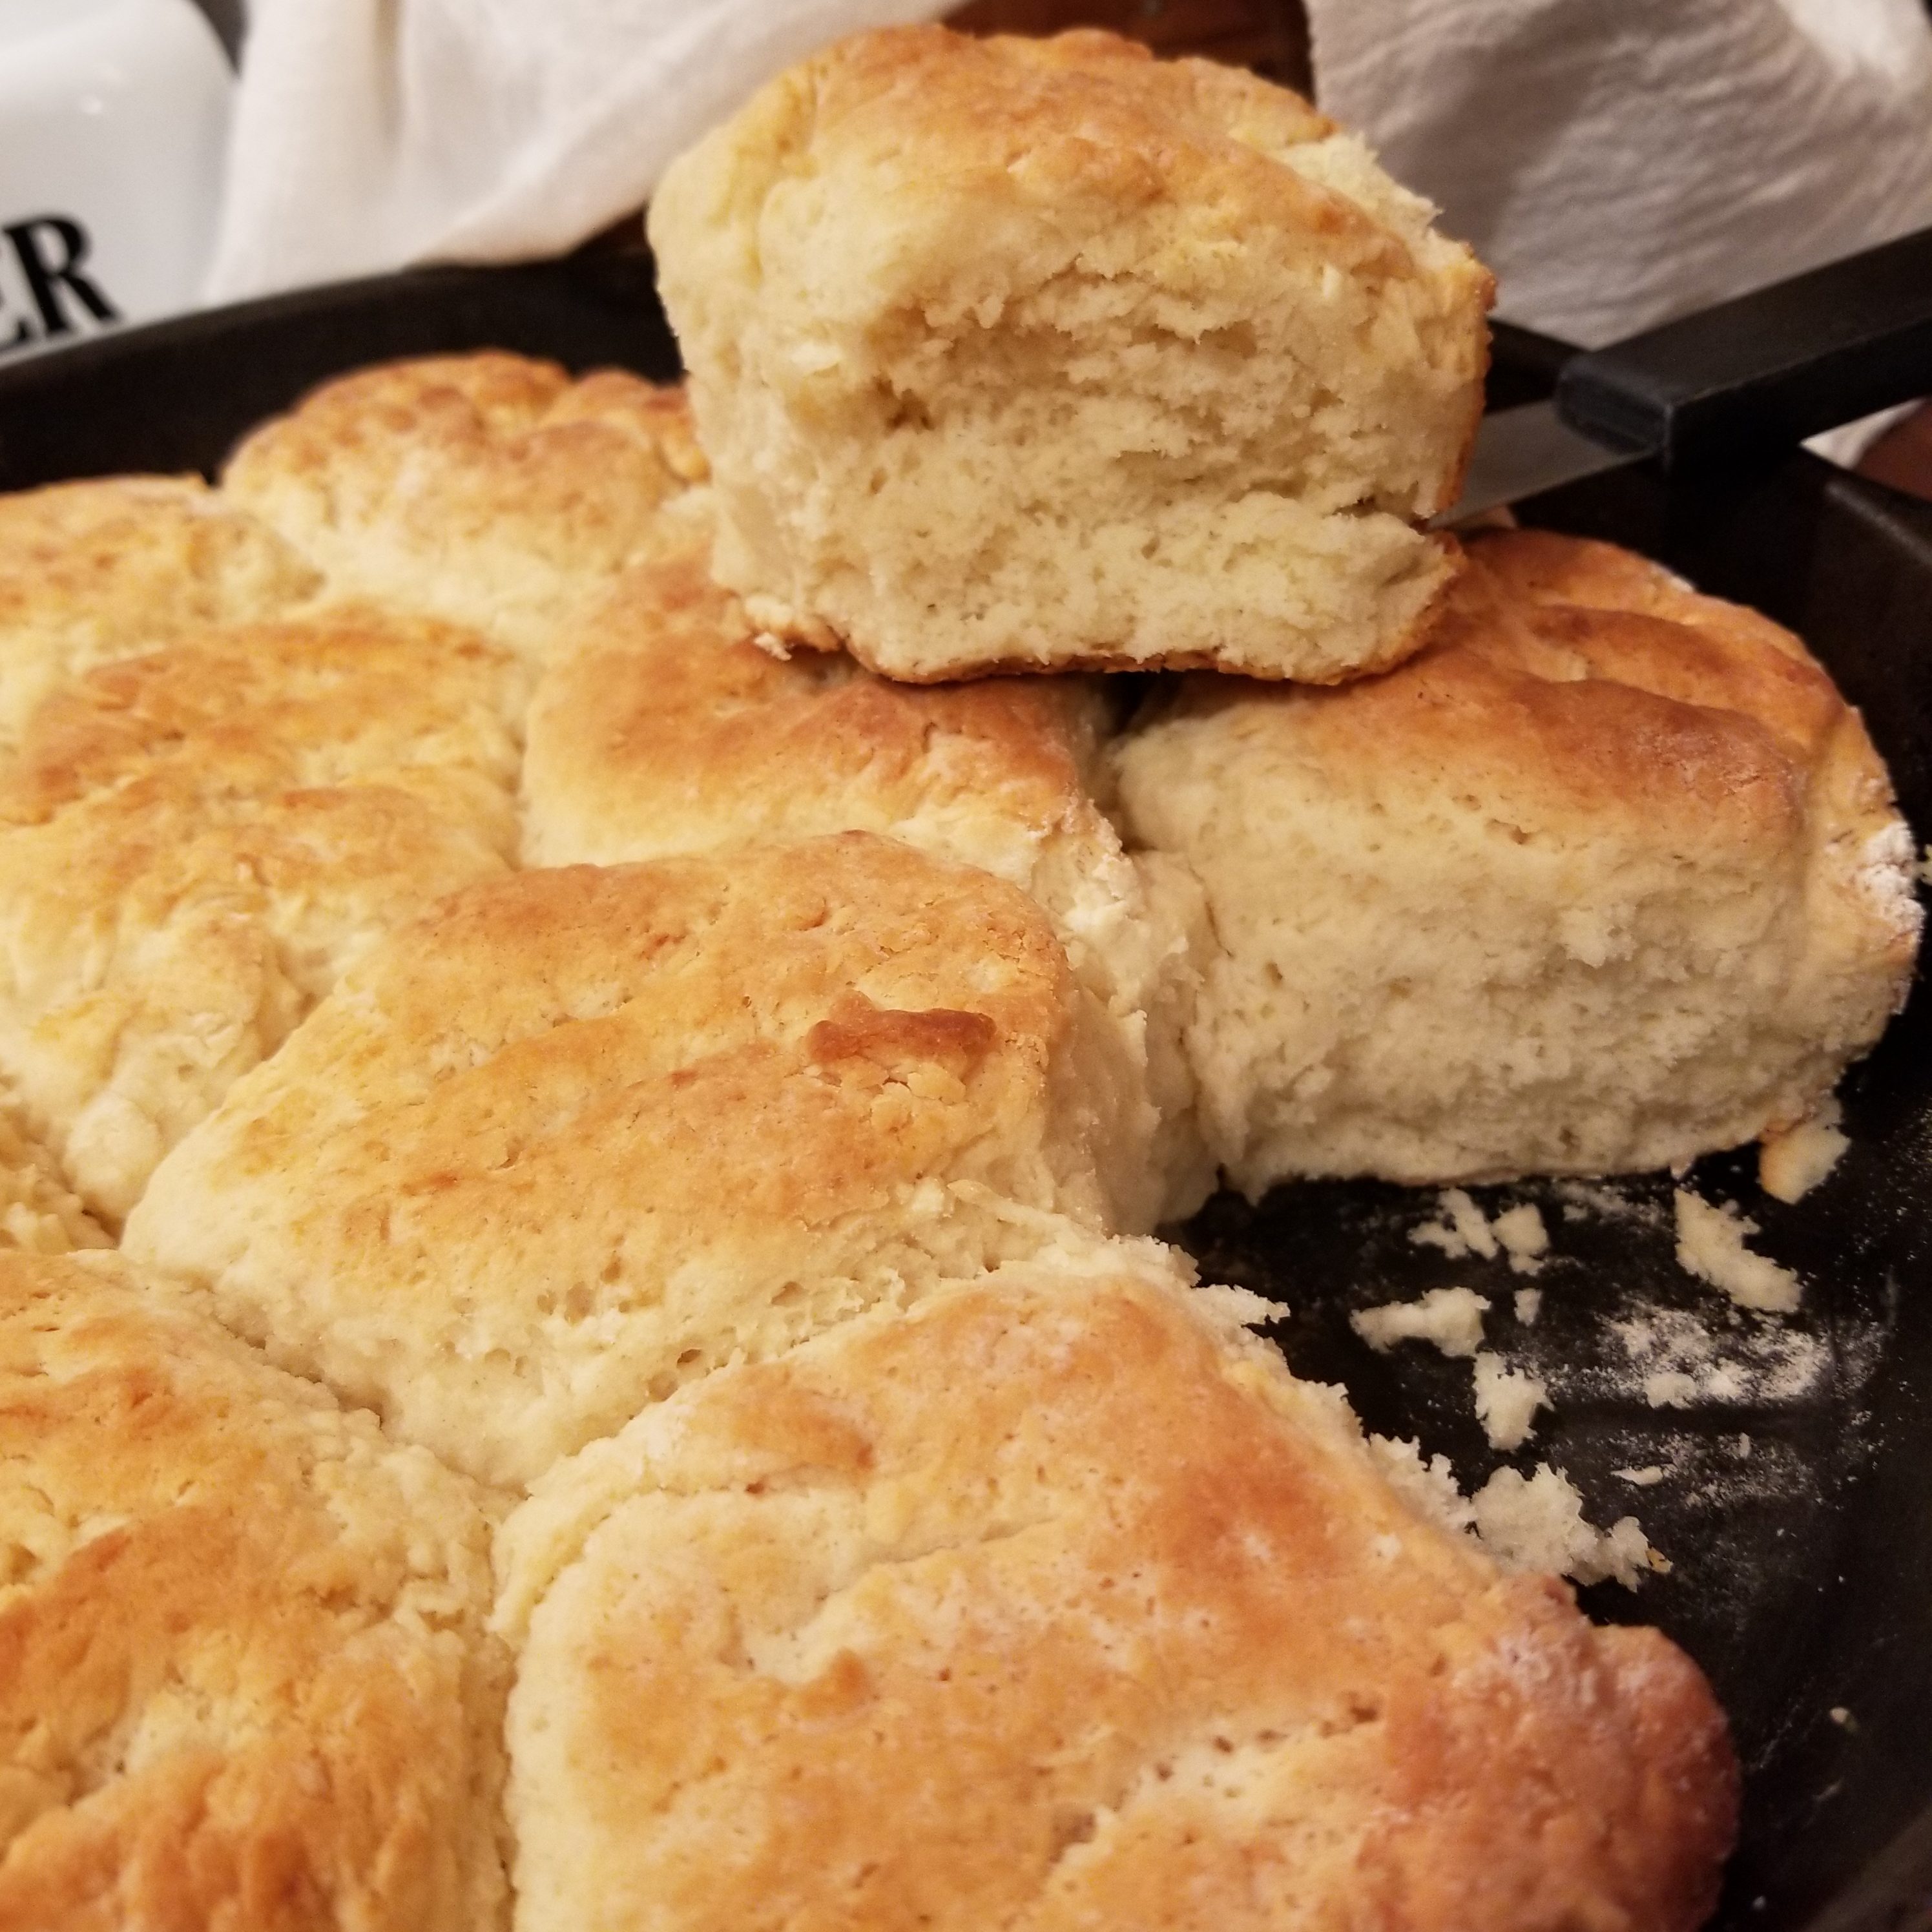
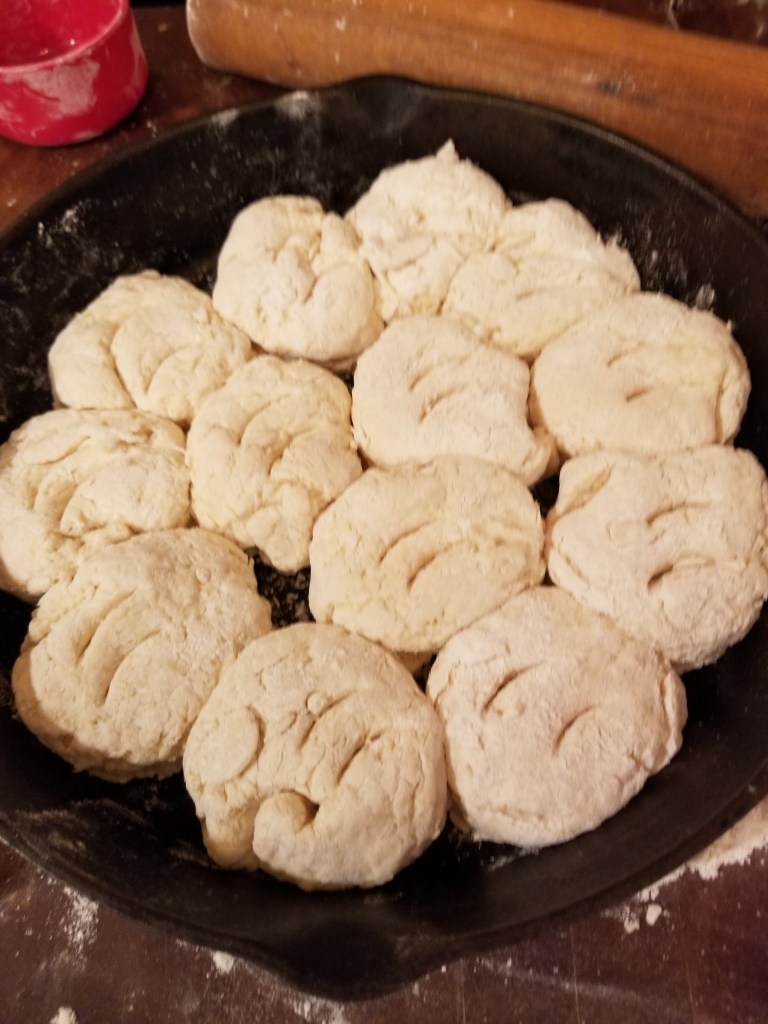
Once cut, place in your pan. I use my cast iron for everything! This recipe will fill a 14 inch cast iron skillet or a 9 x 12 baking dish (like a lasagna pan). Score your biscuits on the top. I use the side of a metal spoon (see scored biscuits in picture above). Then using the spoon, I dab just a little liquid lard on each (use whatever oil you put in the biscuit). This creates the nice golden brown tops and locks in the moisture to your biscuit.
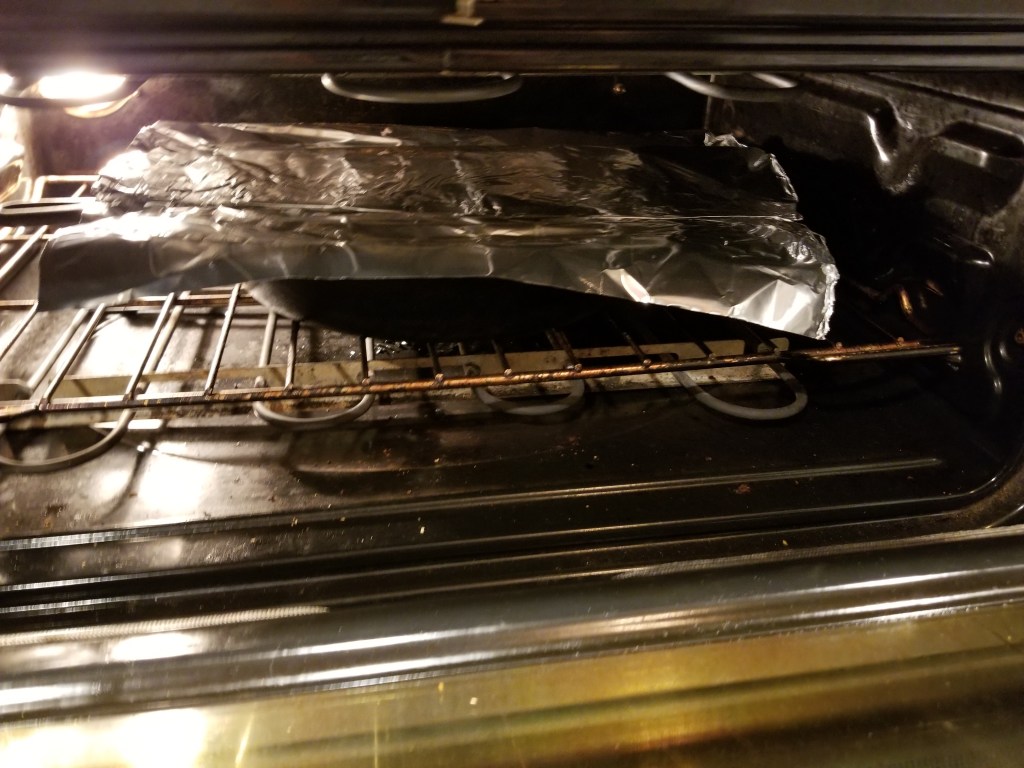
Preheat your oven to 475 degrees. My mom bakes on 500 degrees as dad likes them a bit brown.
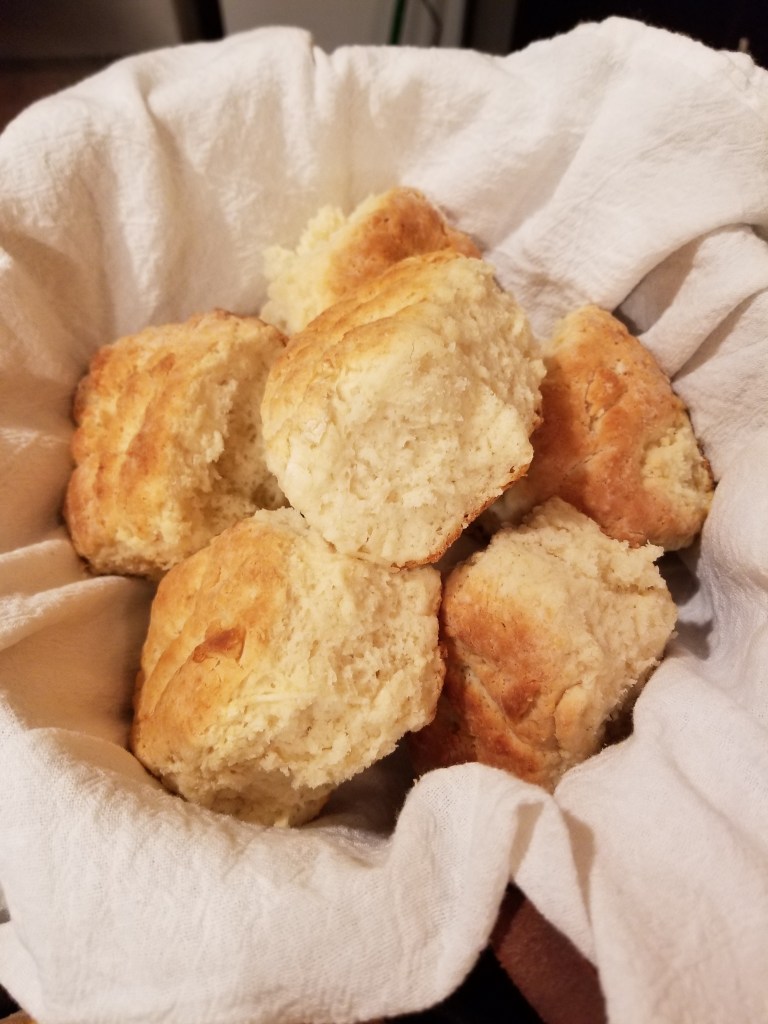
Bake for 20 minutes. My daughter does not like them brown, so I place foil on the top as seen above after they are baking 15 minutes.
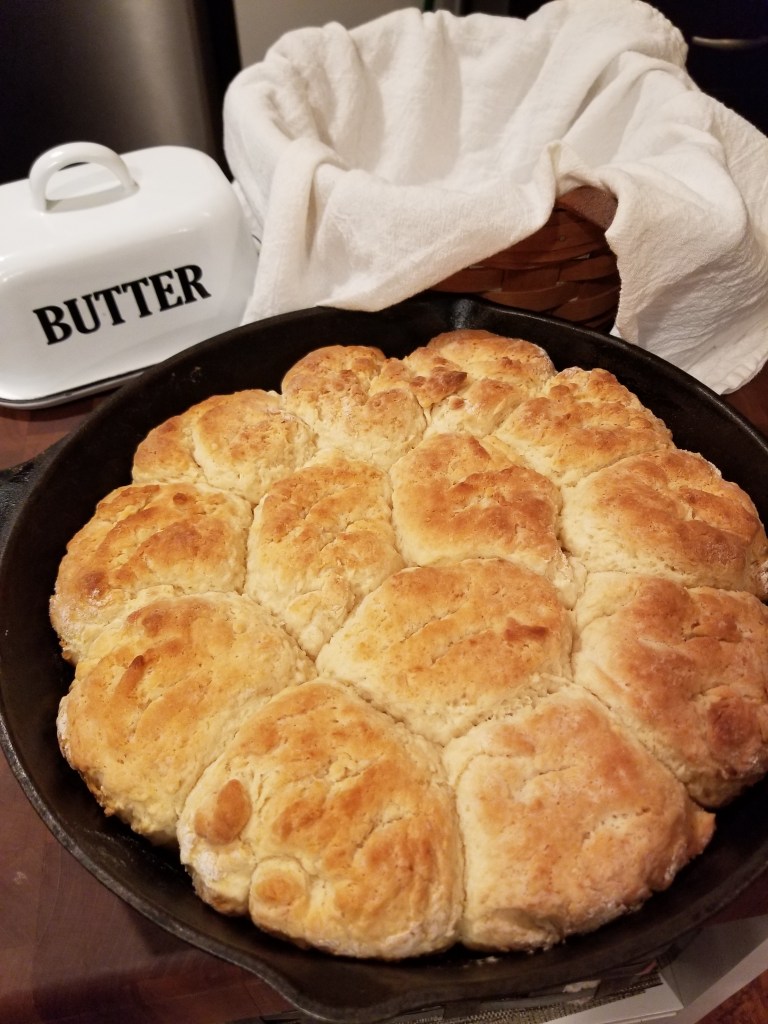
Take out and serve immediately! I like to serve with raw butter and home made jams! YUMMY!
So…..let’s talk old school. We are homesteaders and really want to keep it simple. We try to use everything we either grow/raise or what we are able to source from our local farm friends. Our goal, to obtain as much as we can regionally. I love this recipe with sour buttermilk. We make our own butter from the raw milk we get from the dairy cows. I let it sit until it has soured just a little. It’s perfect! I freeze it in two cup containers so it’s perfectly measured for a batch of biscuits! You can always create sour milk by adding a little distilled vinegar. But not sure about that, just use what milk you have!
I want to comment about lard. I do not recommend lard from the grocery. Most lard on the commercial market comes from hogs that are not pasture raised. The processing of the lard is also important as well as how the hog was raised. Pasture raised hogs are free to run, runt, grunt and grub. They soak up the sun! The sun rays are stored in the hog’s fat as Vitamin D. Free range lard (lard from pasture raised hogs) has 500 to 1000 IU of Vitamin D per teaspoon! It is also the 2nd richest source of Vitamin D! WOW, when I learned this, I was even more super excited we process the entire animal and use it as they did “back in the day”. Watch for my blog coming soon on how to render lard from pasture raised hogs. Video will also be posted to our YouTube channel, Our Farmhouse Kitchen.
If you want to start your own journey sourcing your foods from your backyard or from a farmer near by, find the farmer’s market near you.
Until next time, Happy Homesteading, wherever it is you call home!
#candjhomestead #ourfarmhousekitchen #homesteadinginthehills # #lifeanddesign #homesteadingmama #growingfood #healthylivingwithfarmgirljo #certifiedtrimhealthymamacoach #homesteadky #homesteading #homesteadinglife #homesteader #homesteadlife #homesteadmama #growingcrops #homesteadkitchen #thesimplelife #oldfashiononpurpose

One Comment Add yours